For graphic designers understanding digital file formats is a must but for people who are not graphic designers it can be down right confusing.
When your designer creates your logo or marketing materials the files are typically designed in Adobe Illustrator unless it is a multipage document then it will most likely be designed in Adobe InDesign. Once the files are complete they will be saved for print or digital use.
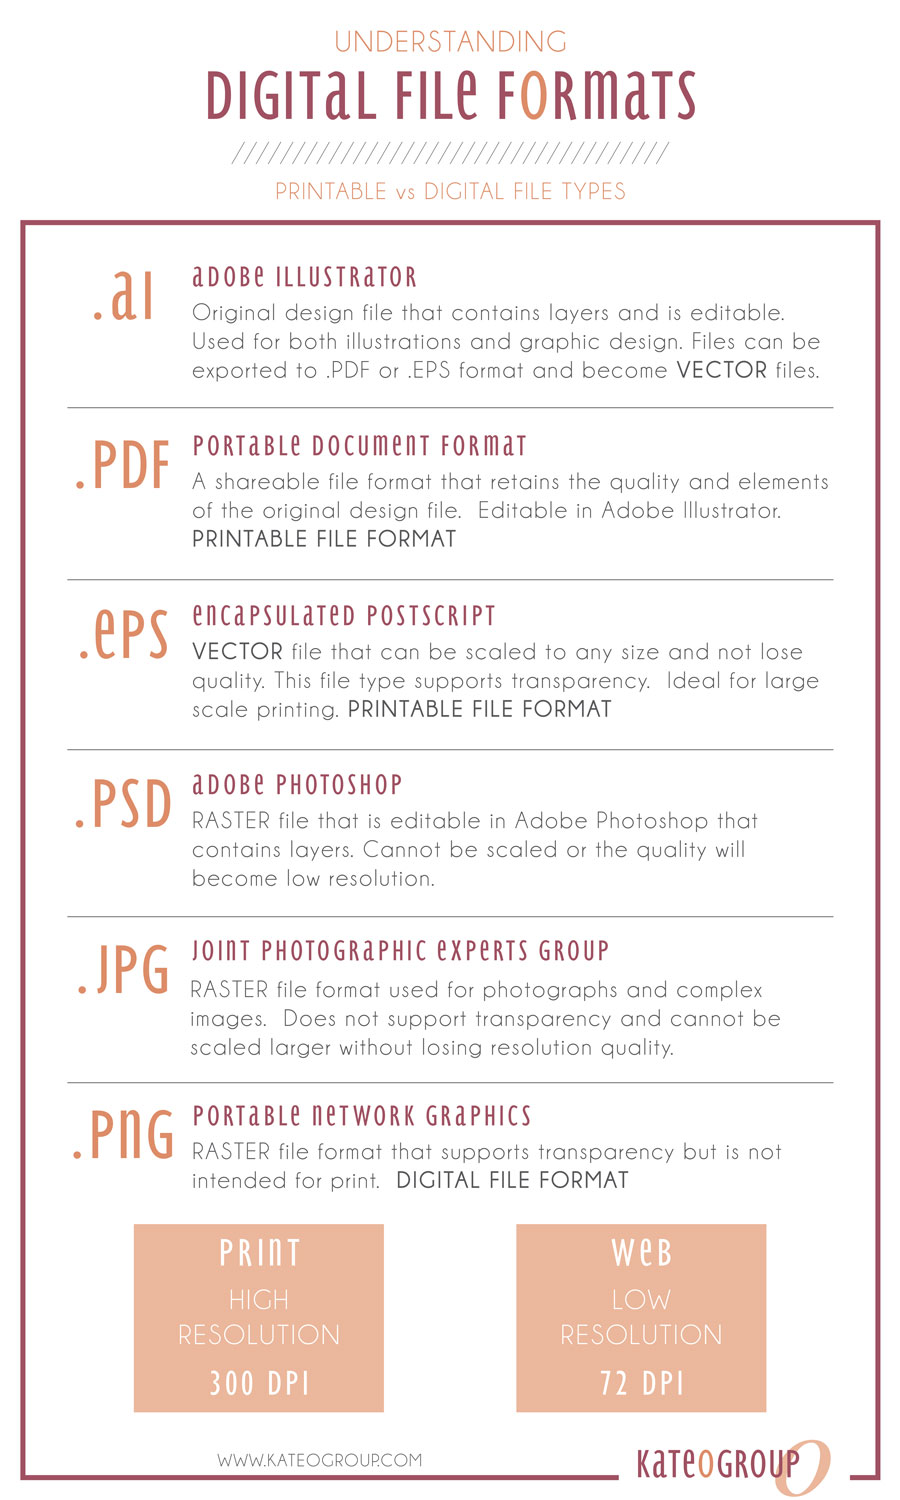
Printable Digital File Formats
Files that are saved for print will be in PDF or EPS format. These file types are considered vectors. These formats retain their resolution at any size. A PDF file will be printed true to size. Use an EPS file when large scale printing is necessary.
Online Digital File Formats
JPG and PNG formats are best for use online and are raster files. Neither format will retain their resolution when scaled to a large format. The biggest differences between the two file types are that a PNG format has a transparent background and is normally larger than a JPG. A PNG file is the best option when your logo is being used in a brochure or online because it has a transparent background. It will seamlessly work on any background. A JPG is the best choice for uploading an image or graphic to your website.
I hope understanding different file formats is now a bit easier with this infographic I created. Do you have any questions about digital file formats I didn’t cover?
Now that you know about file formats are you planning to start designing your own logo? We’ve got a few tips to help you get started.

 You’ve settled on a